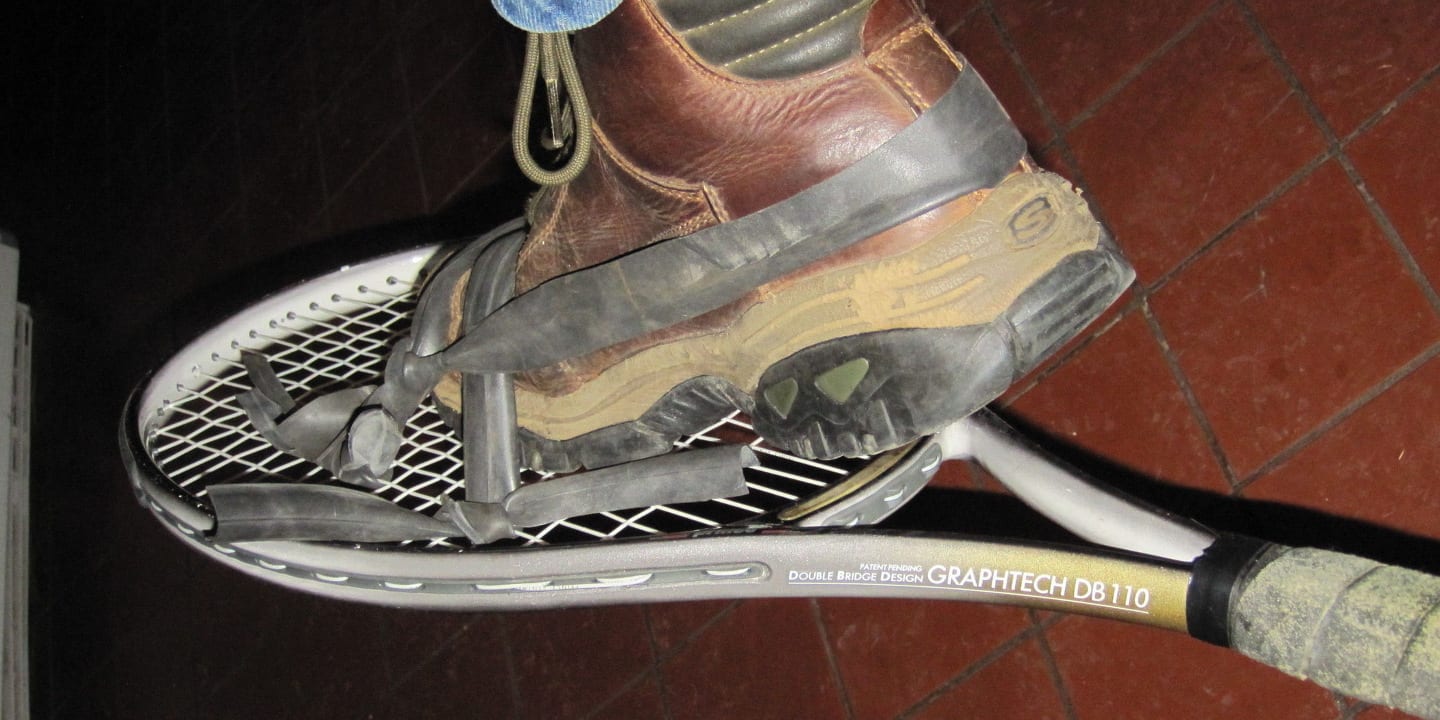
[Tennis racket snowshoes. Photo: instructables.com] Trudging through the snow in regular boots is a very exhausting experience. It doesn’t take very much weight to sink through a foot or more of snow with each step. Not only will this drain your energy, it will prevent you from traveling very far as well.
This is why a good pair of quality snowshoes is invaluable in the winter. Snowshoes will distribute your weight atop a large area to prevent your foot from sinking in too far. This means that you can cover more ground and spend less energy in the process.
Durable homemade snowshoes for cheap
That being said, quality snowshoes are expensive. Cheaper ones on the market start at around sixty to eighty dollars, with higher quality ones costing up to several hundred dollars.
If finances are tight or if you simply don’t think it’s worth spending so much on a pair of snowshoes, you’ll be comforted in knowing that there are proven methods for you to make your own pair of durable snowshoes either with materials you already have, or with items you could buy on a very small budget. You’ll be out snowshoeing in Colorado in no time!
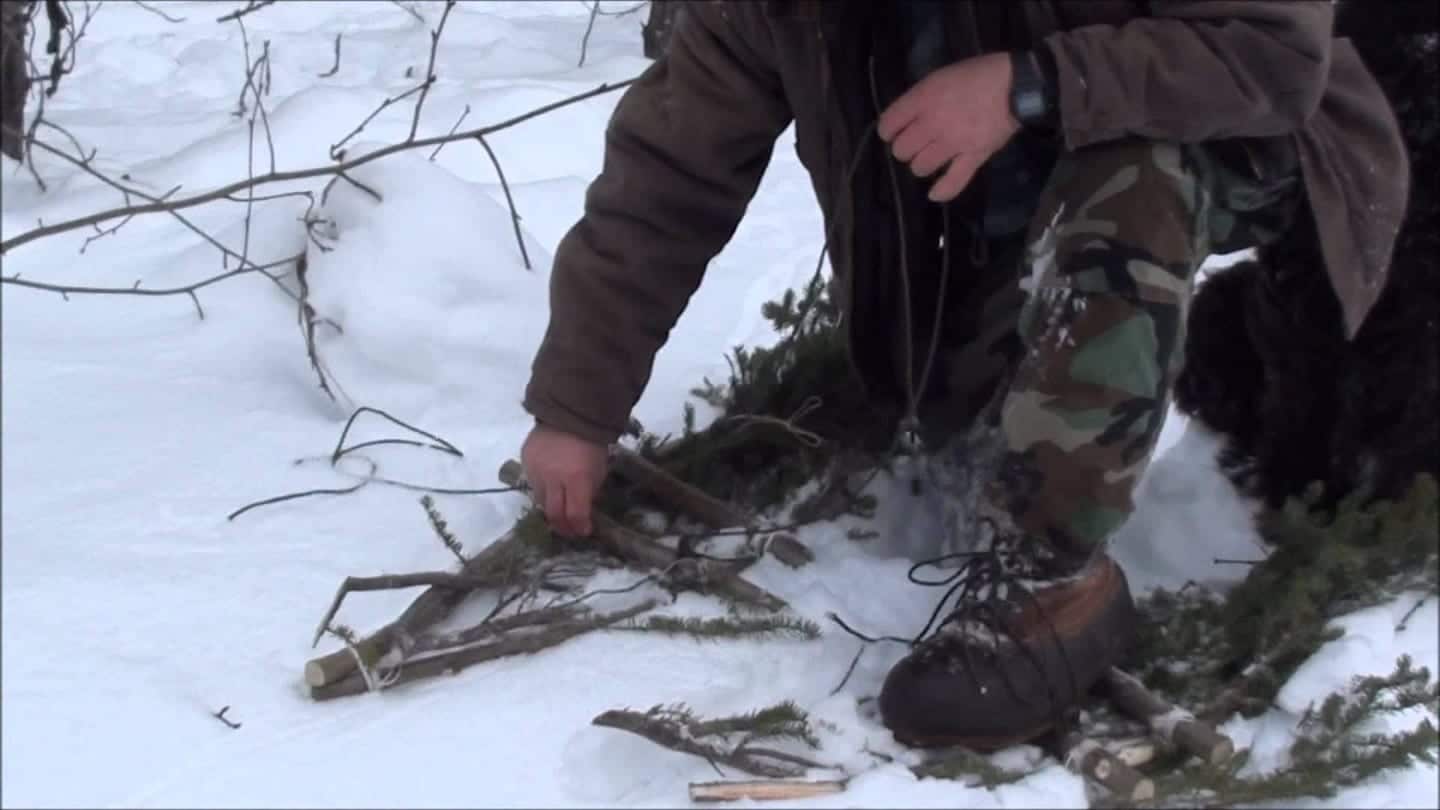
Snowshoes Out of Branches
You can make your own snowshoes out of the branches that you find in the woods or in your backyard. Branches from willow, spruce, pine and fir trees work the best since they are the most flexible and durable.
For this method, you’ll need a sharp knife, strong cord or rope, and tree branches. The branches should already be flexible, but in case they’re not, you can warm them over a stove or a fire (provided they don’t burn). Next, bend the branches into the shape of a traditional snowshoe, several inches larger than your foot on all sides. Tie the two ends tightly with cord into an x-shape.
Following this, you’ll need multiple smaller branches to serve as the crosspieces for the snowshoe. The crosspieces will need to be placed so that they can distribute your weight. To this end, at least one crosspiece will need to be placed where the ball of your foot goes, with more crosspieces to support the rest of your foot while being placed several inches from one another.
With your crosspieces now tied on and secured, take even more small branches and tie them on to the current crosspieces to form a crisscross. When this is complete, use as much rope as you need to make sure that all of the branches and crosspieces are fully secured. You can then tie the rope around the entire snowshoe to place your boots in.
Test out your new snowshoe by walking around in the snow; if it feels durable and holds up, you’ve got yourself a new pair of snowshoes. If they feel wobbly or fall apart, try re-tying them on more securely or find new branches that are more flexible. All in all, your new snowshoes may look crude, but they will work.
Tennis Racket Snowshoes
Do you have an old pair of large tennis rackets in your storage room somewhere? If not, you can always buy a set at a store for a reasonable price. For this set up, you’ll need two tennis rackets, a good pair of snow boots, and some duct tape.
This method is very simple to set up, and even though it’s not the same as buying a professional snowshoe kit, they’ll work just as well as the branches technique. Take a good pair of tennis rackets that are large enough for you to place your feet on and distribute your weight.
Then, place a snow boot in the center of each tennis racket. Use your duct tape to lash your snow boots onto the tennis rackets. Use as much tape as you need, but the goal is to make sure that the boots are very securely fastened onto the tennis rackets.
The resulting product may not look pretty, but it will work just as well as any other bargain method you can think of. It’s definitely well worth sacrificing two tennis rackets and an old pair of snow boots for!
Plywood Snowshoes
This set up is similar to the tennis racket snowshoe method but requires additional steps and materials. You’ll need two pieces of plywood that are about two feet long and less a than foot wide. In addition, you’ll need a pair of snow boots, a sharpie, rope, straps, a saw, and something sharp that can punch holes through the plywood.
Take your sharpie and draw the shape of a snowshoe onto the plywood. There should be two ends: front (for your toes) and back (for your heel). At the toes, the corners should both be round. At the back, the plywood should be cut more narrowly with a well rounded end. Use your saw to cut according to the sharpie marks. Repeat this same process for the other piece of plywood.
Next, place a snow boot in the middle of the plywood, with the heel of the boot facing the heel of the plywood. Drill two or three holes into the plywood on either side of the boot through which you can run cord to fasten the front boot onto the plywood. Tie the rope very tightly.
To secure the heel of the boot to the plywood, use something more durable such as a strap to wrap around the back of the boot, run both ends along the side of the boot, and then run them through holes drilled in the front of the boot, and tie it tightly.
You’ll now have a good pair of snow boots that should last you through the winter!
 Kim Reichhelm: From Extreme Skier to Extreme Confidence Builder